DeskPi Lite NAS Case (DP-0020)
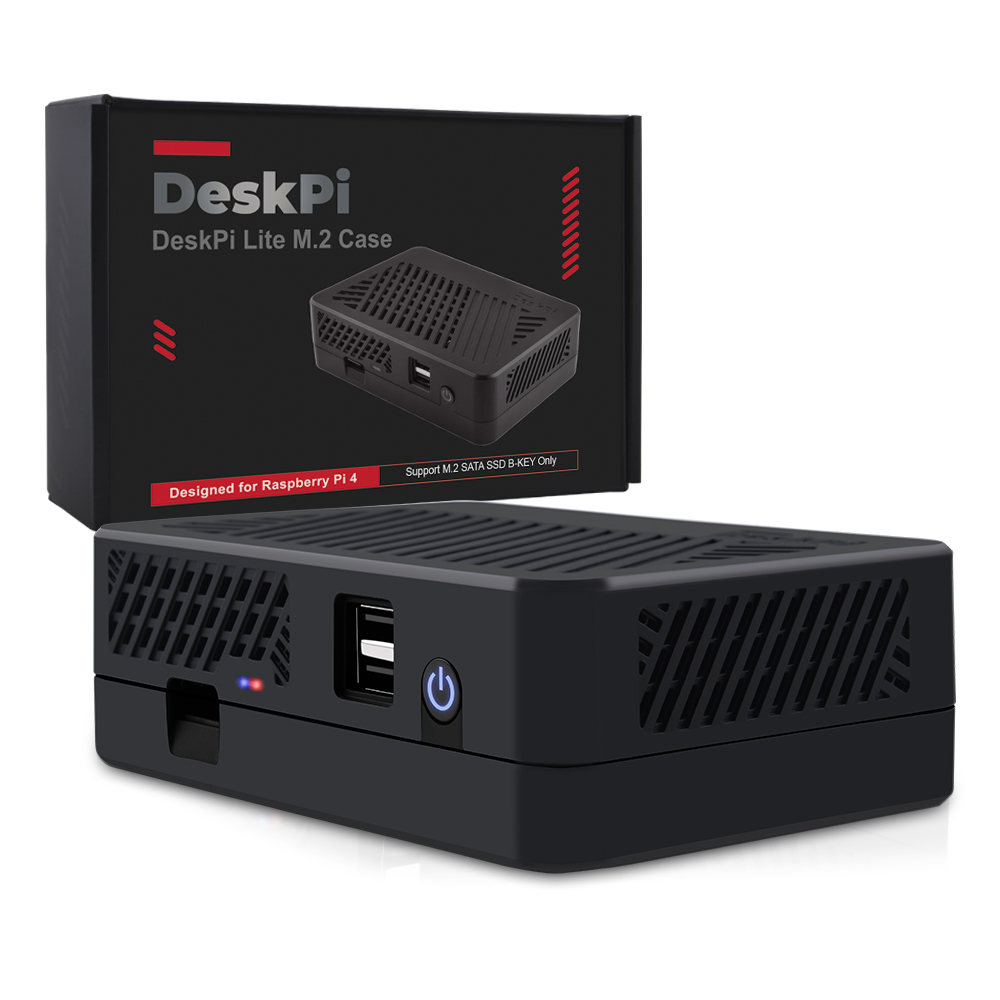
Description
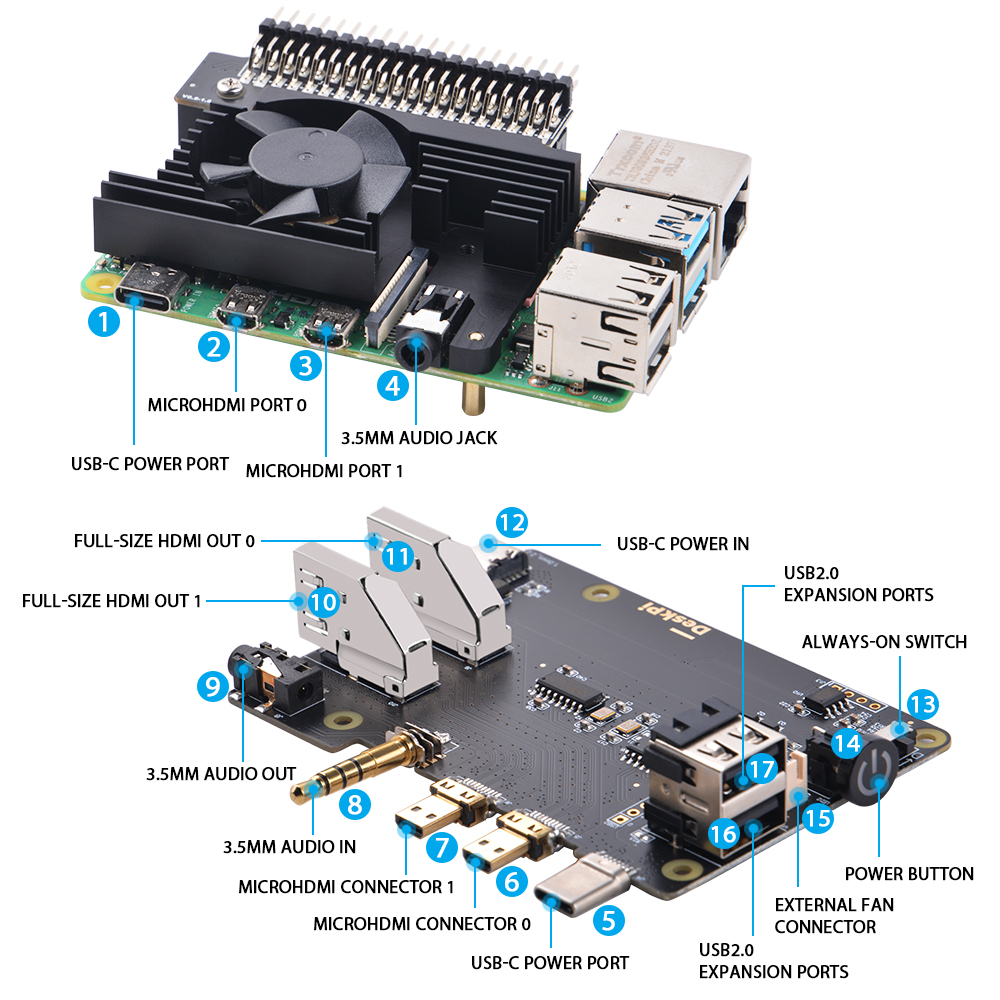
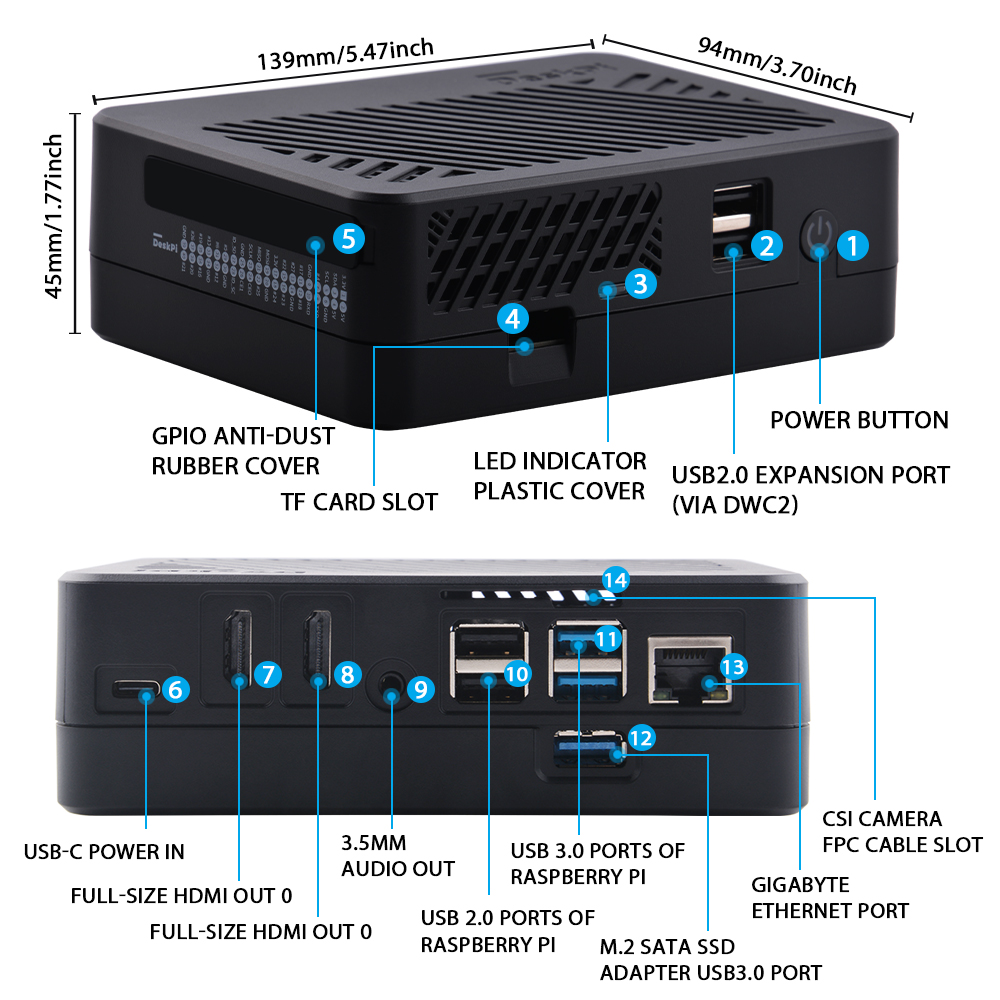
The DeskPi Lite NAS is an ABS case with an integrated M.2 SATA SSD expansion board, a cooling heatsink, and a PWM signal controlled fan. This case provides reliable protection for your NAS components, efficient heat dissipation, and the flexibility to adjust fan speed according to your requirements. It is a practical and functional solution for expanding storage capacity while maintaining optimal performance in your NAS system.
Key Features
-
ABS Case: The DeskPi Lite NAS features a sturdy ABS (Acrylonitrile Butadiene Styrene) case that provides durability and protection for your M.2 SATA SSD expansion board and other internal components. ABS is known for its strength and impact resistance, making it an ideal material for this type of case.
-
M.2 SATA SSD Expansion Board: The case is designed with an integrated M.2 SATA SSD expansion board, allowing you to easily install and securely mount an M.2 SATA SSD. This expansion board provides additional storage capacity for your NAS setup, enhancing its versatility and performance.
-
Cooling Heatsink: To maintain optimal operating temperatures for the M.2 SATA SSD and other components, the DeskPi Lite NAS incorporates a cooling heatsink. The heatsink efficiently dissipates heat generated during extended operation, preventing overheating and ensuring the reliable performance of your NAS system.
-
PWM Signal Controlled Fan: The cooling heatsink is accompanied by a PWM (Pulse Width Modulation) signal controlled fan. This fan is capable of dynamically adjusting its rotational speed based on temperature requirements. By monitoring the system temperature, the fan can automatically increase or decrease its speed to provide effective cooling while minimizing noise levels.
-
Adjustable Fan Speed: The PWM signal controlled fan allows you to adjust the fan speed manually, providing flexibility in balancing cooling performance and noise levels according to your preferences. This feature enables you to optimize the cooling efficiency of your DeskPi Lite NAS while maintaining a quieter environment.
-
Efficient Airflow: The combination of the cooling heatsinks and the PWM signal controlled fan ensures efficient airflow within the case. This airflow helps to dissipate heat effectively, keeping the M.2 SATA SSD and other components within the optimal temperature range, even during demanding usage scenarios.
-
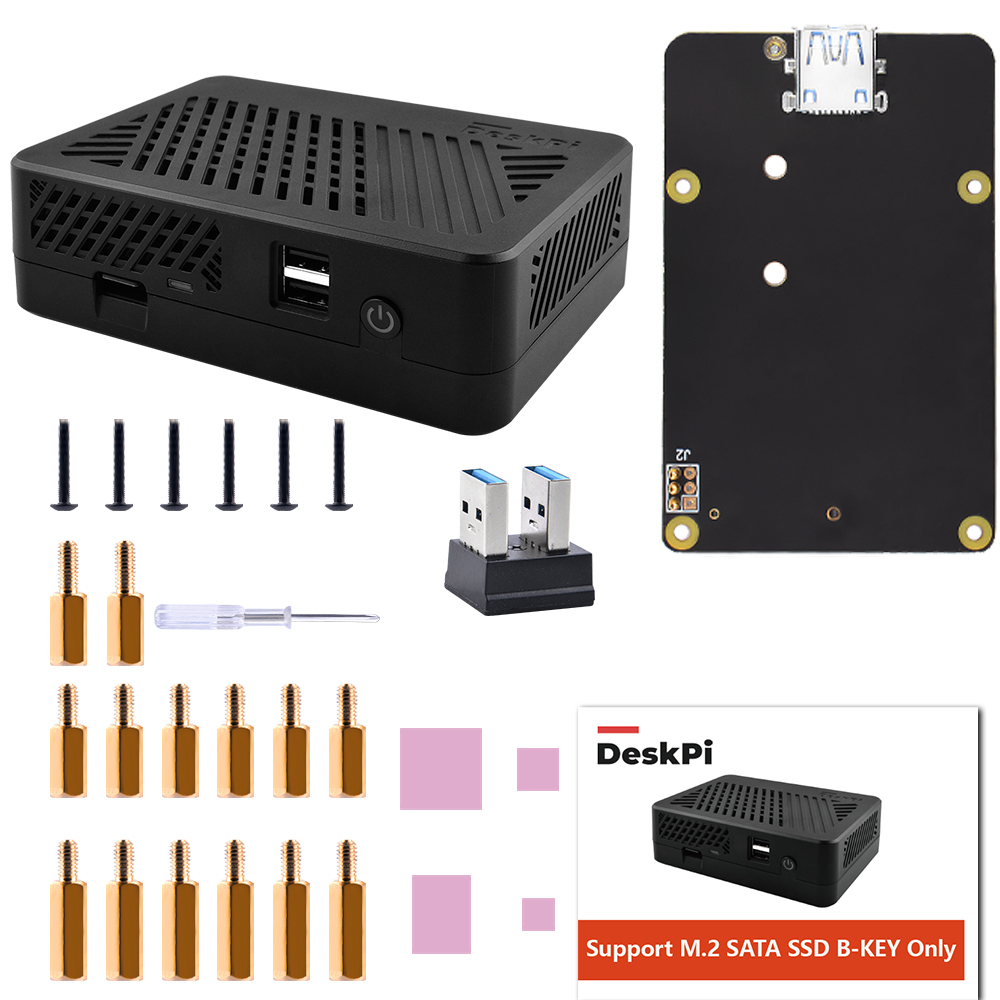
Easy Installation: The DeskPi Lite NAS is designed for straightforward installation. It typically includes all the necessary mounting hardware and connectors, making it easy to assemble and integrate with your existing NAS setup.
-
M.2 SATA SSD Adapter board (
Support M.2 SATA SSD B-KEY Only)
Note: M.2 SATA SSD drive and Raspberry Pi 4B is not included in the package, additional purchase required.
Compatibility
- Raspberry Pi 4 model B Only
Gallery
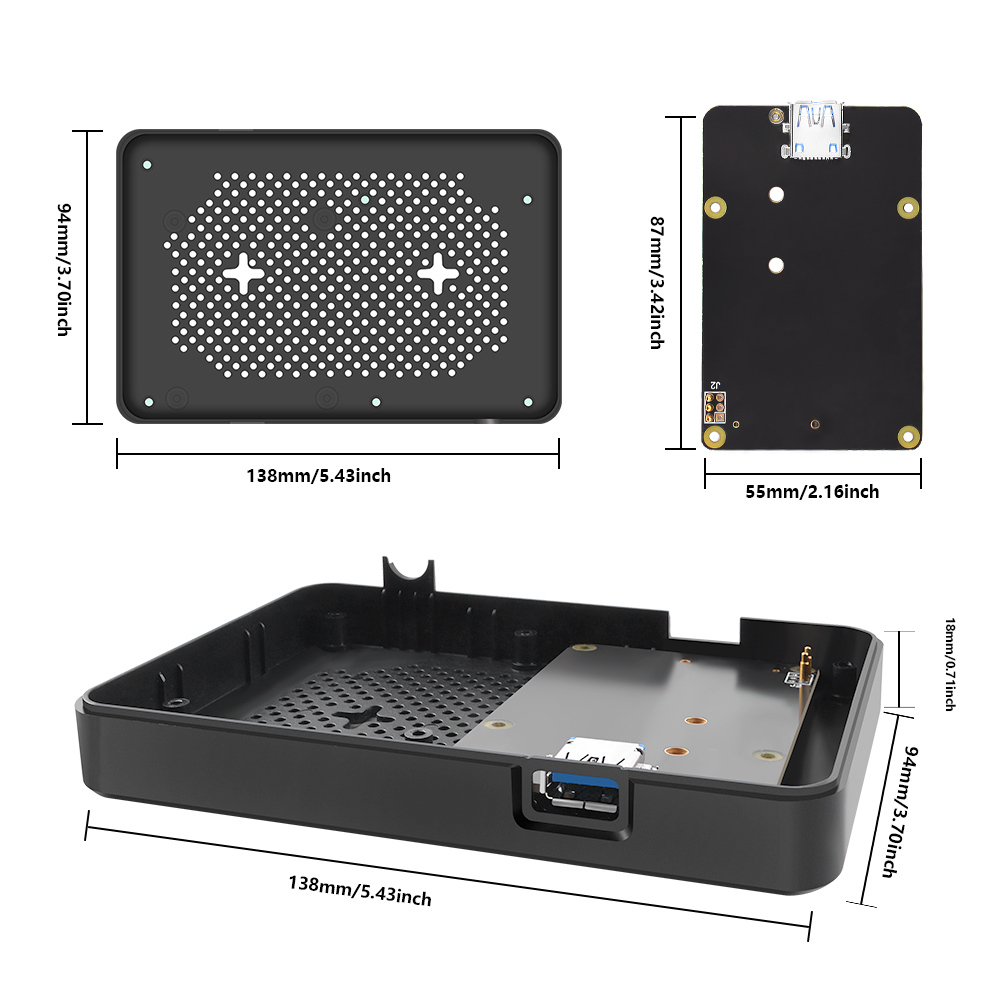
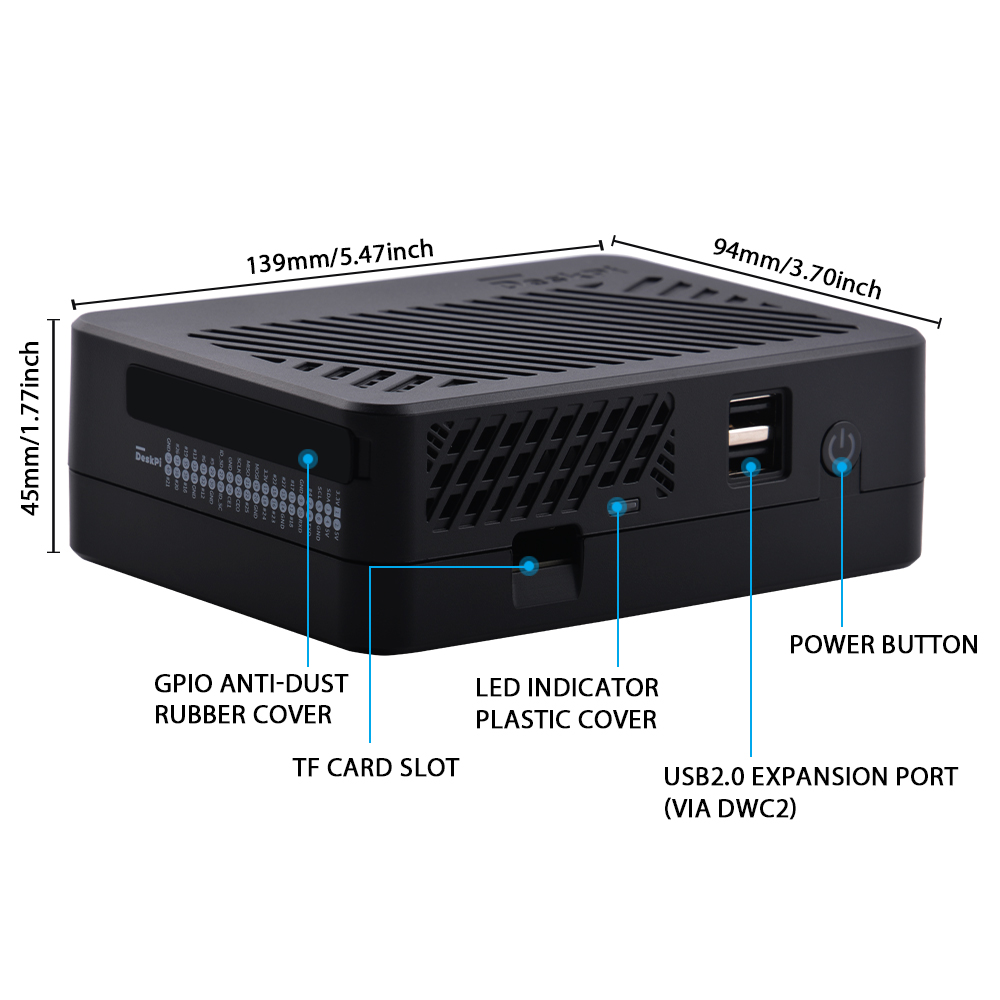
-152bf343de91b0eac5ec097a1fbebf2e.jpg)
Supports M.2 B-Key or B+M Key SATA SSDs only. M.2 NVMe (PCIe) drives are not supported by this expansion board.
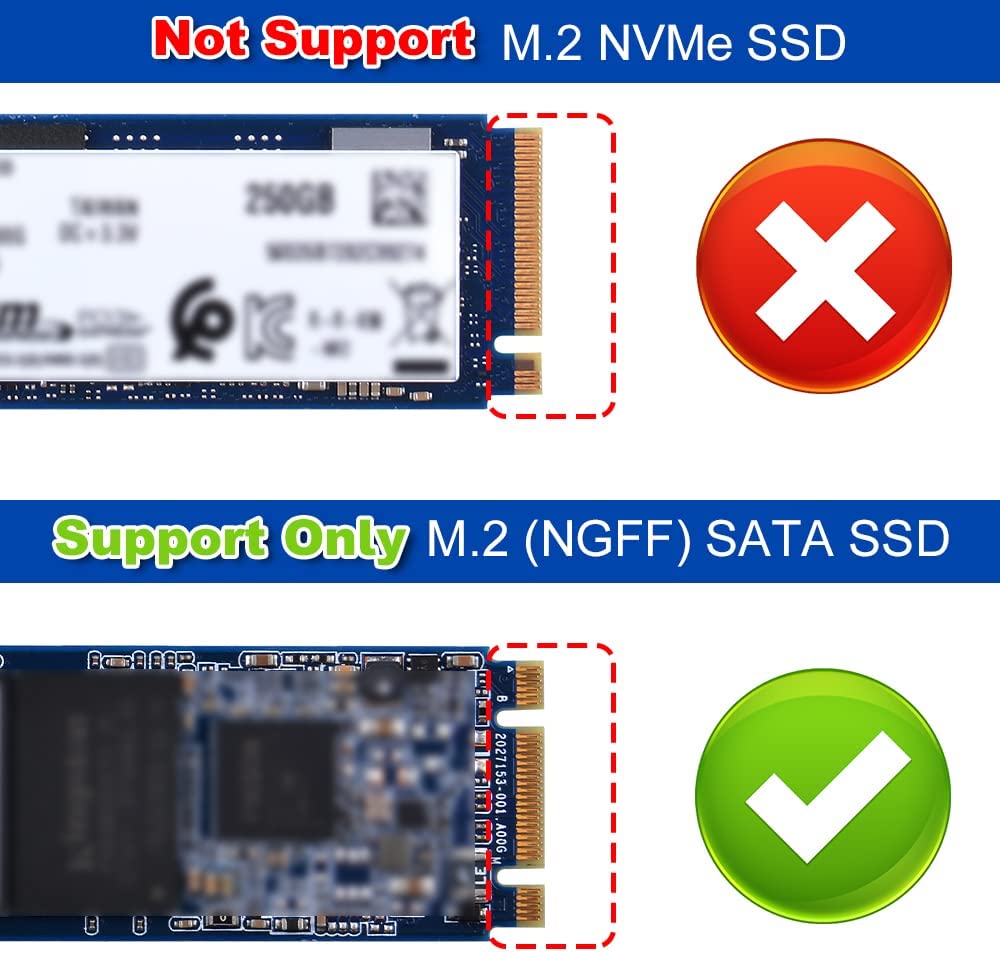
Supported: M.2 SATA B-Key / B+M Key. Unsupported: M.2 NVMe M-Key.
LED Indicator Status
- Red: Power on indicator
- Green: Disk read/write activity status
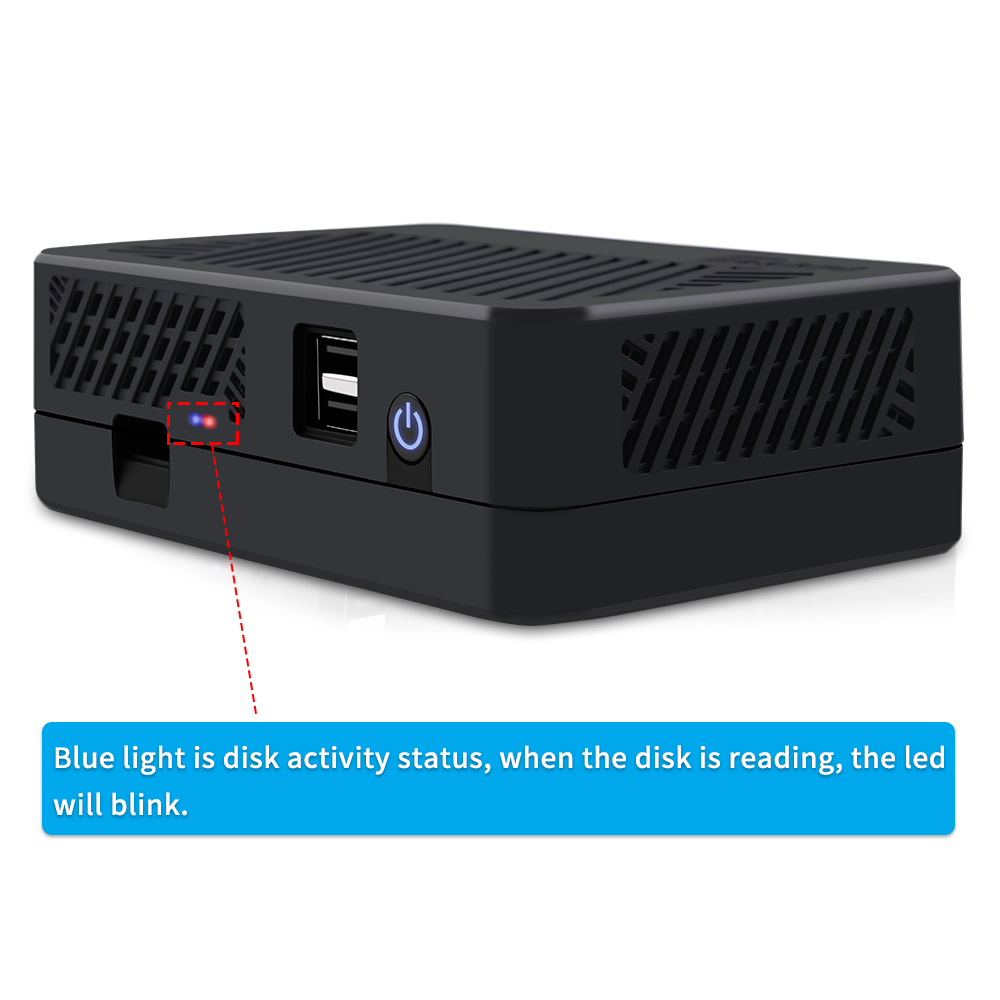
LED indicator placement and activity states
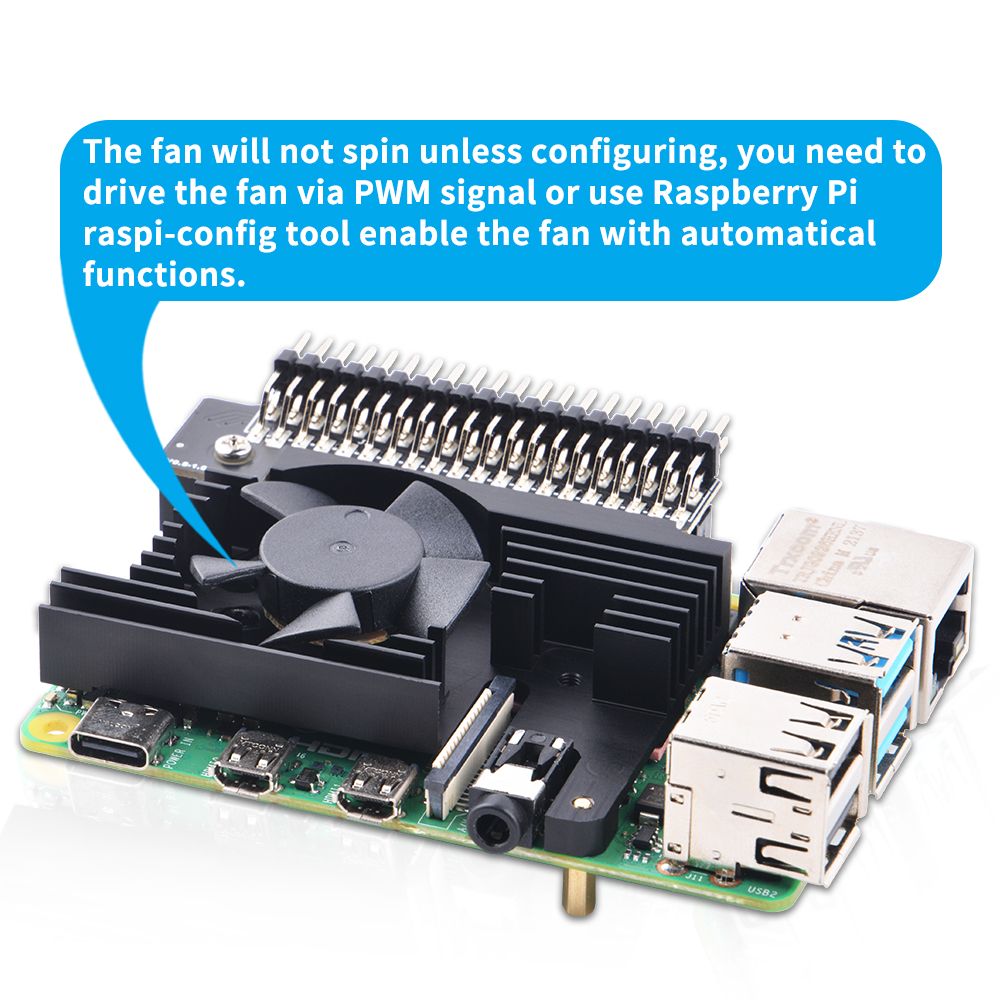
PWM Fan Installation Note
Please connect the fan header according to the color-coded polarity diagram:
How to Assemble It
- Open your DeskPi Lite, remove ABS bottom case.
- Fix M2x7+6mm copper pillar to those two positions to keep heatsink steady.
- Fix another two holes with M2x7+4mm copper pillars.
- Fix M.2 SATA SSD drive to M.2 SATA SSD adapter board with flat head screw.
- Fix the M.2 SATA SSD adapter board to Raspberry Pi with M2x7+4mm copper pillar (make sure the copper pogo-pin contacts well with GPIO soldering points).
- Fix DeskPi Lite daughter board and upper case with M2x10+4 copper pillar.
- Fix bottom case with screws.
- Connect the USB3.0 connector on the back of DeskPi Lite to the USB3.0 Port.
Assembly Figures
Step 1: Install Expansion Board
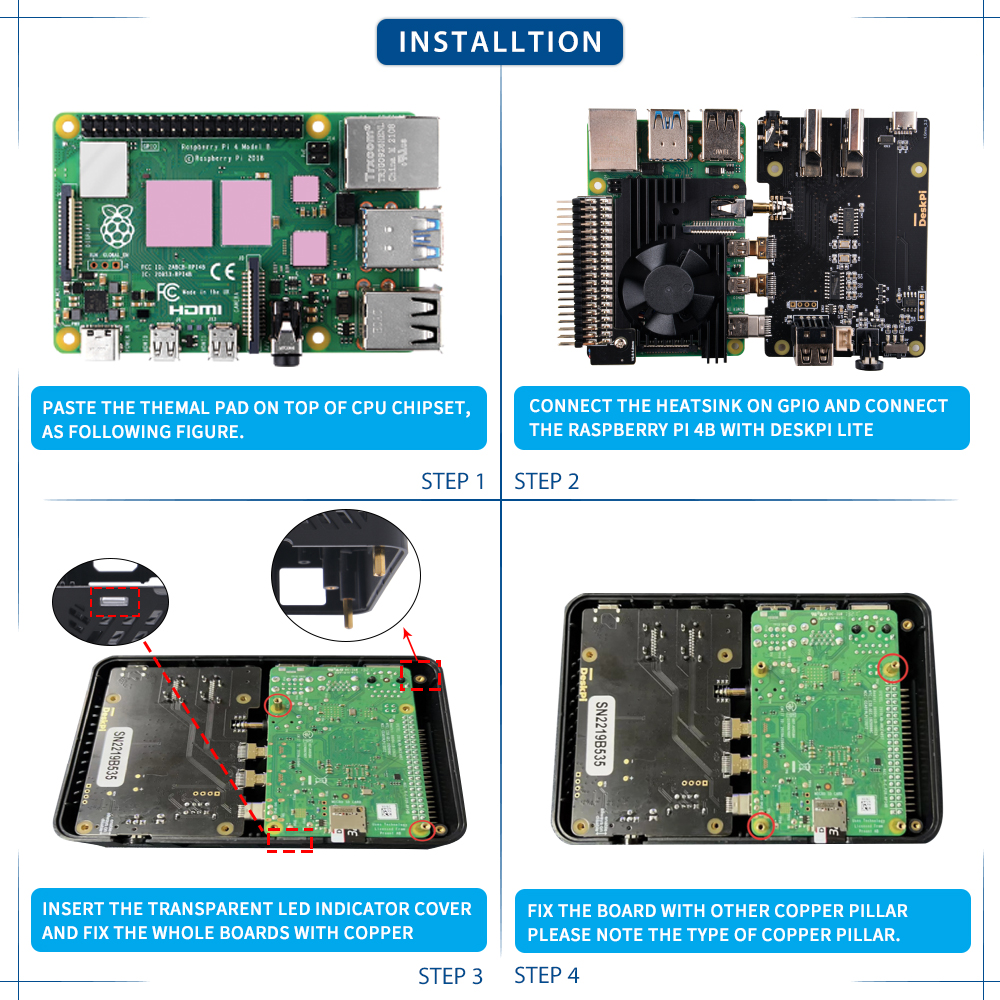
Step 1: Mount SATA board and connect pogo pins
Step 2: Assemble Housing and Fasten Pillars
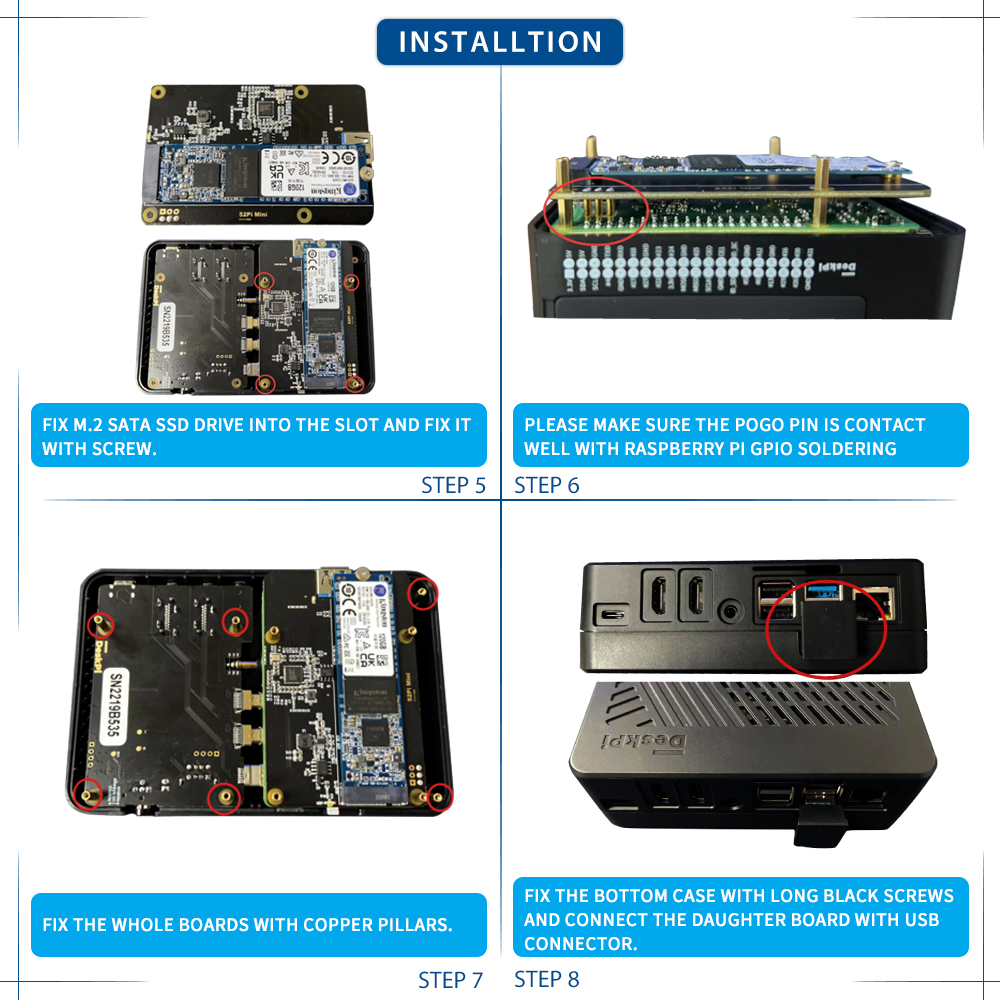
Step 2: Fasten copper pillars and attach lower housing
Exploded View & Pillar Selection
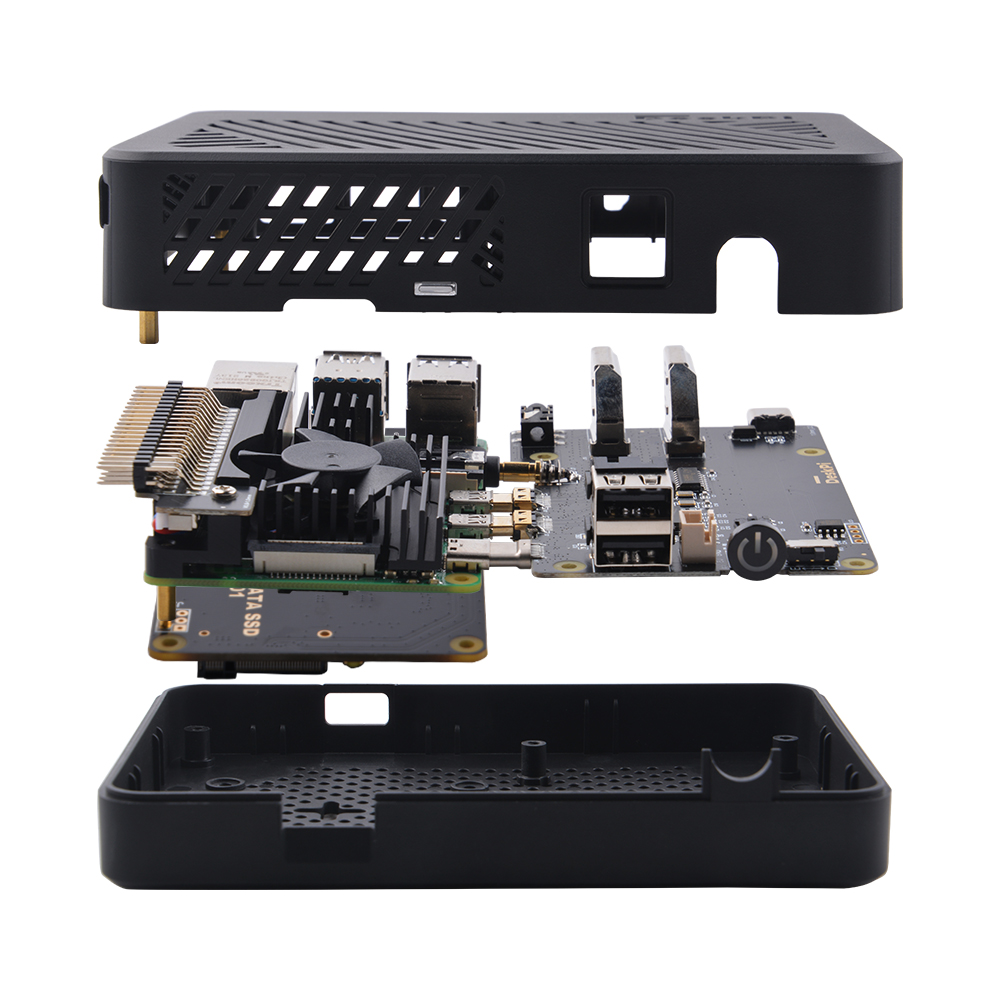
Exploded component view
Note: Check pillar heights carefully before tightening screws.
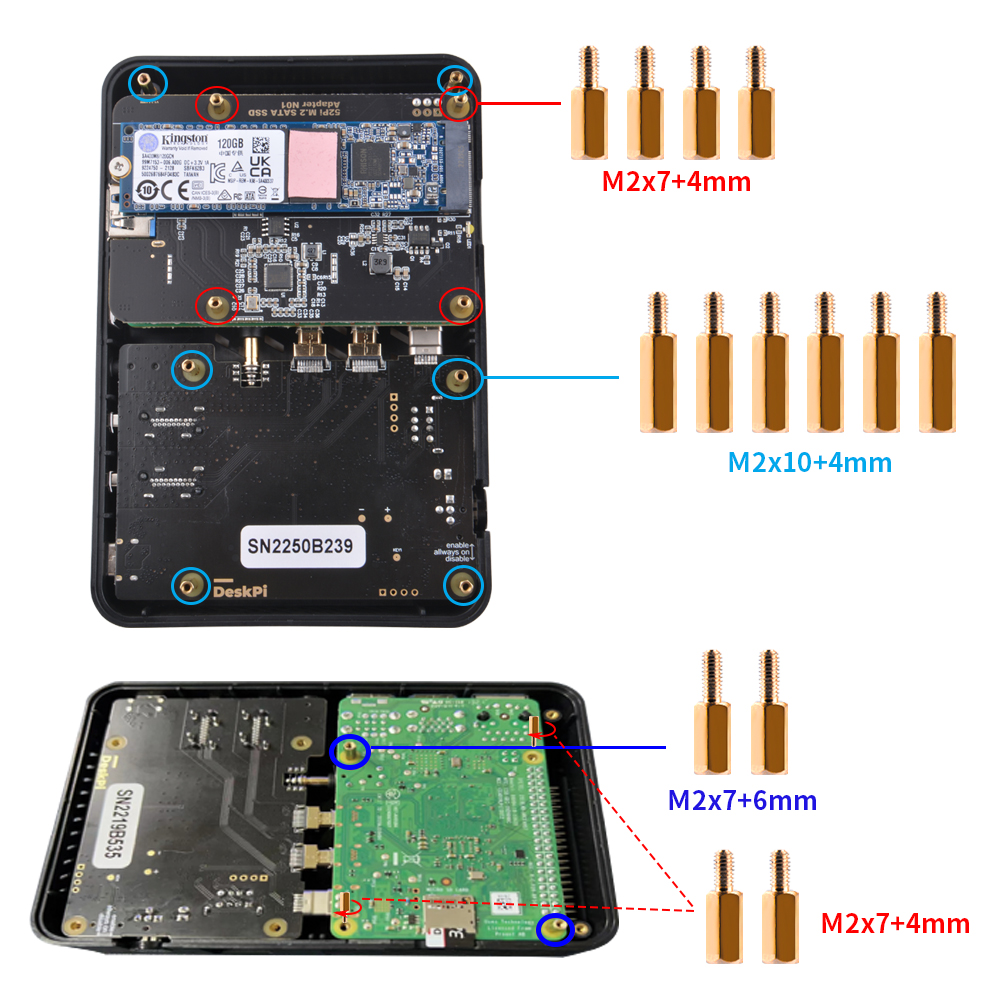
Copper pillar specifications and correct placement
How to configure M.2 SATA SSD
Connect HDMI cable to HDMI port, Power supply to USB-C port and then connect the mouse and USB keyboard to DeskPi lite, Press power button and waiting for system booting up, log into system and open a terminal.
-
Check if the M.2 SATA SSD has been recognized. Typing:
lsblk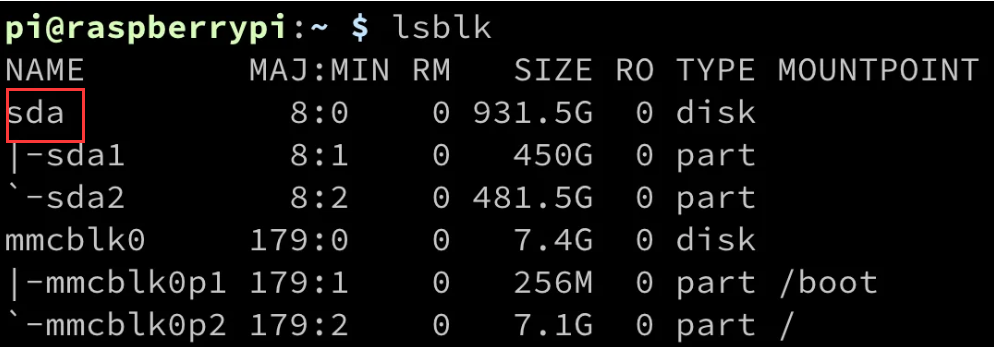
You should see a disk identified as
sdarepresenting your installed SATA SSD. -
Parted and format partition
sudo fdisk /dev/sdapress
nfor new partition, and then presspfor primary partition, press1means first partition, and then press twiceenter, make the whole disk as one partition, presswto write the partition table to disk and pressqto quit.sudo partprobe /dev/sdasudo mkfs.ext4 /dev/sda1 # format the disk to ext4 filesystem.mkdir /home/pi/mydisk # make a mounting pointsudo mount -t ext4 /dev/sda1 /home/pi/mydisk #Mount disk to mounting pointsudo chmod 777 /home/pi/mydisk # grant user to access and write permisions.sudo chown -R pi:pi /home/pi/mydisk # grant user pi to take ownership of the folder.You can also configure a Samba file sharing server to access the storage across your local area network (LAN).
How to enable adjustable speed fan
-
Open a terminal window and launch the configuration tool:
sudo raspi-config -
Navigate to 4 Performance Options:
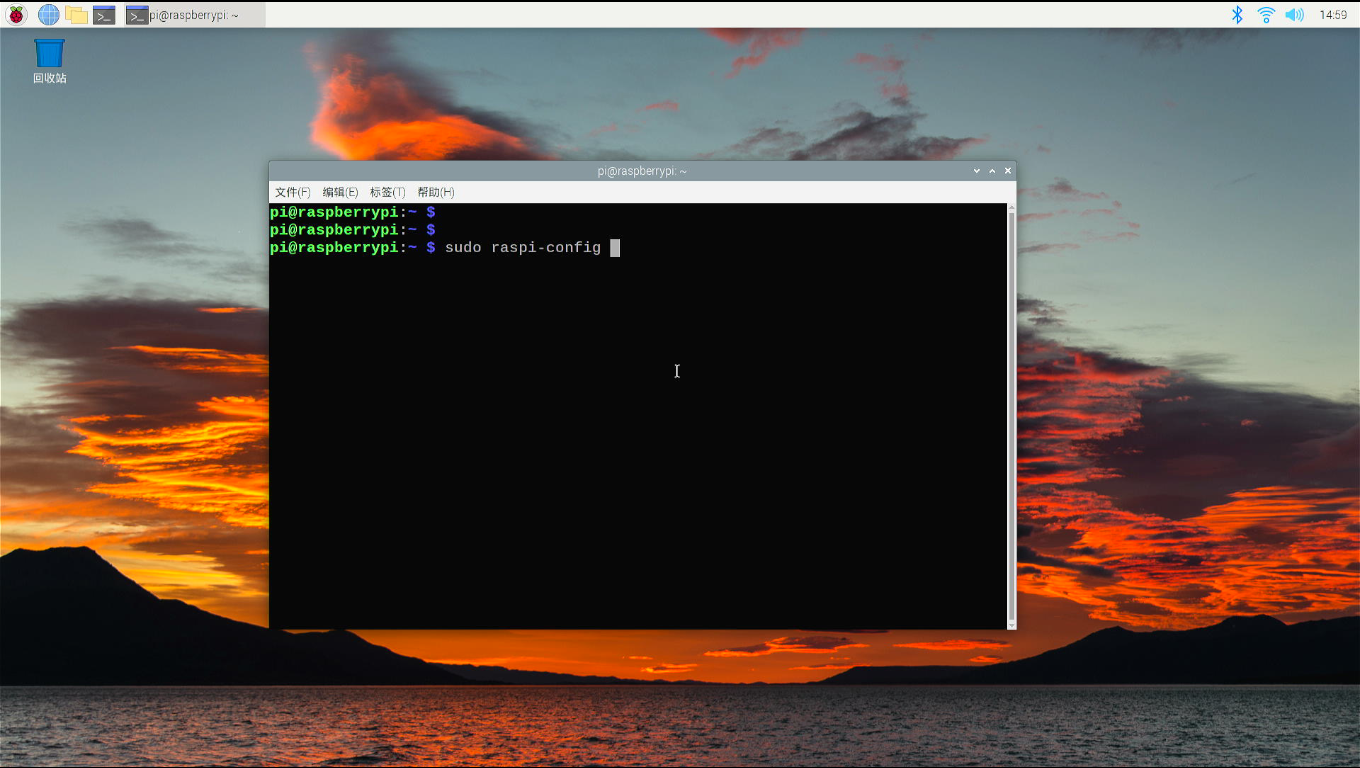
-
Navigate to P4 Fan and press Enter:
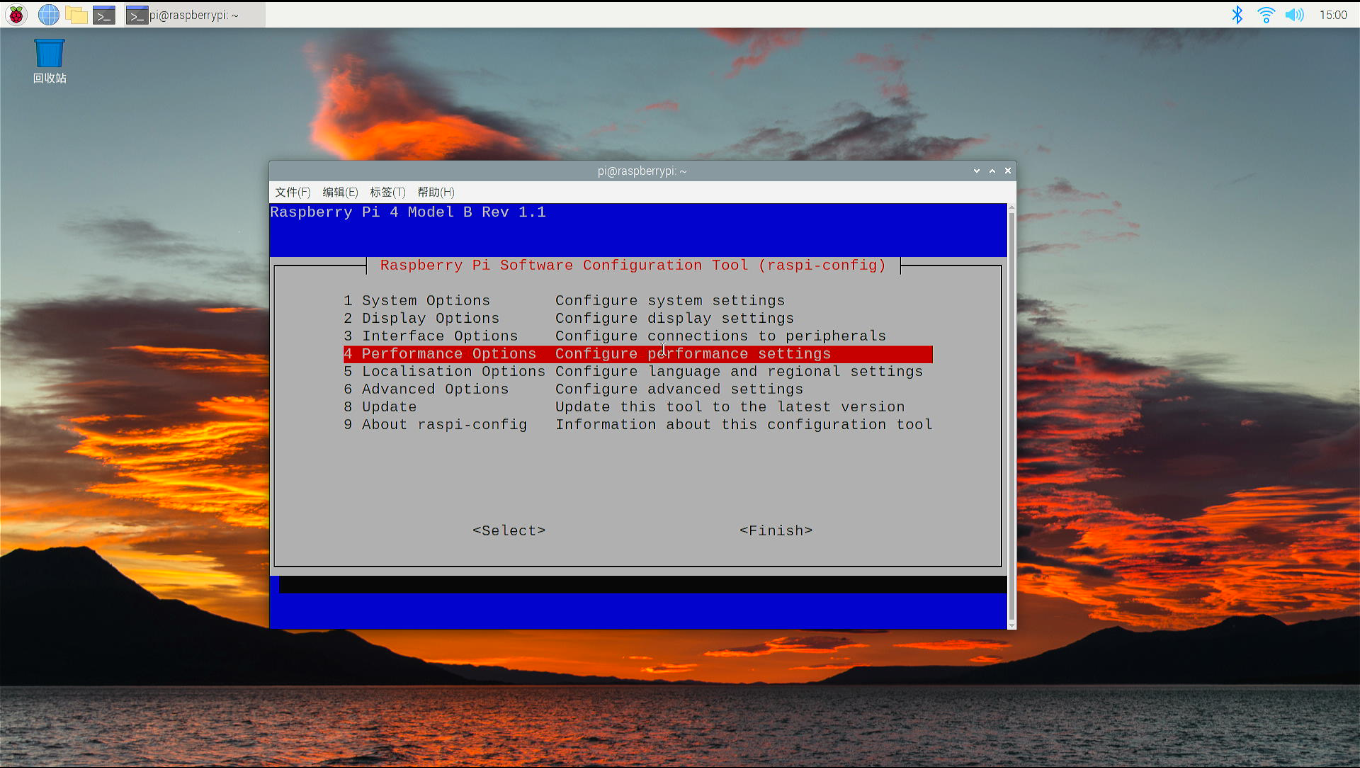
-
When prompted to enable fan temperature control, select Yes:
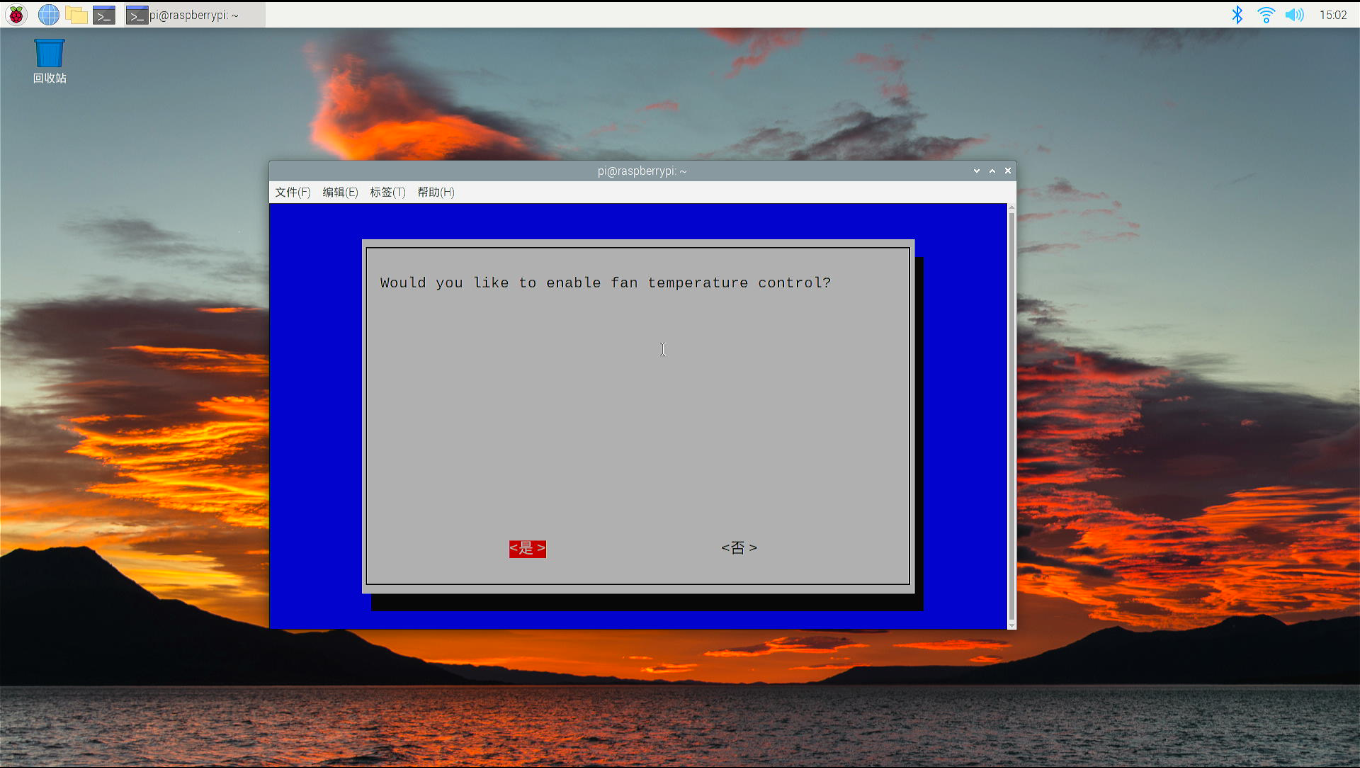
-
Keep GPIO pin
14as the default PWM control pin and select OK: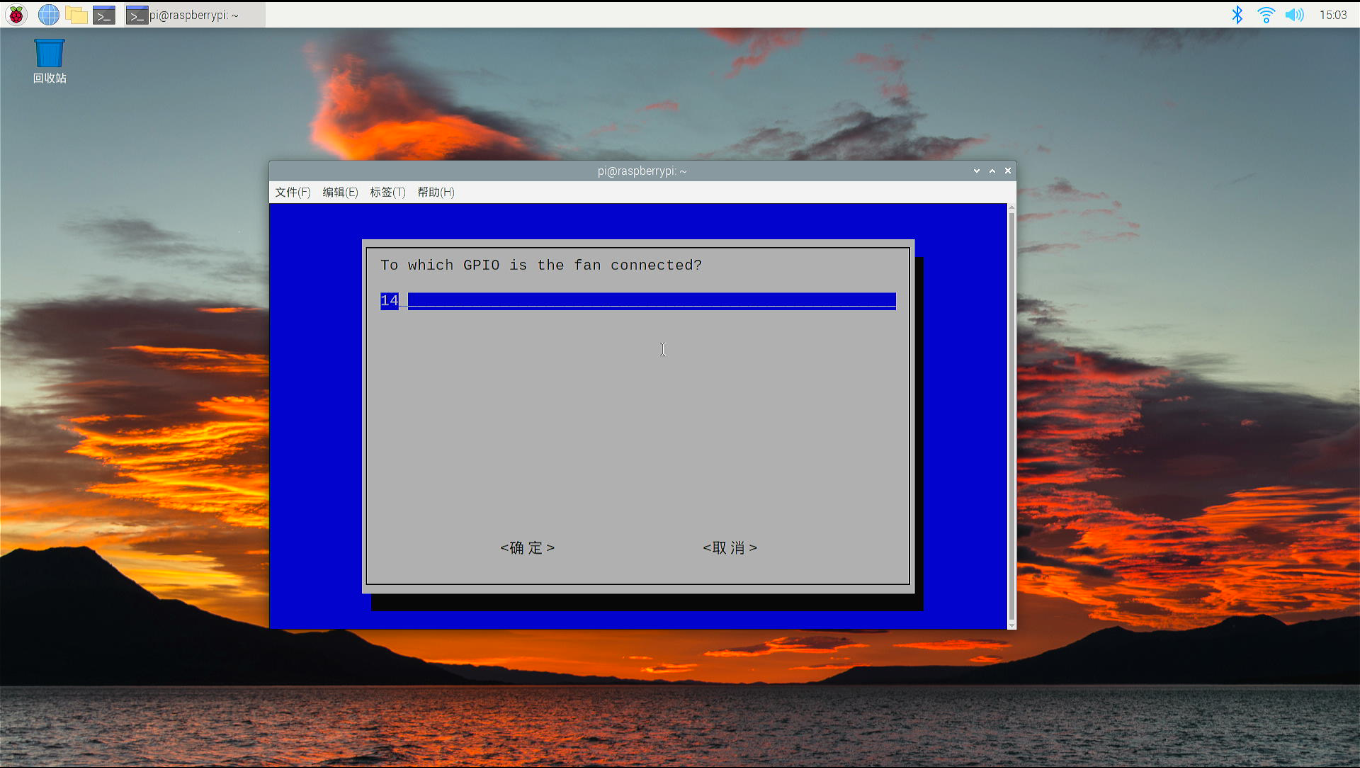
-
Enter the threshold temperature at which the fan should turn on (recommended:
60°C):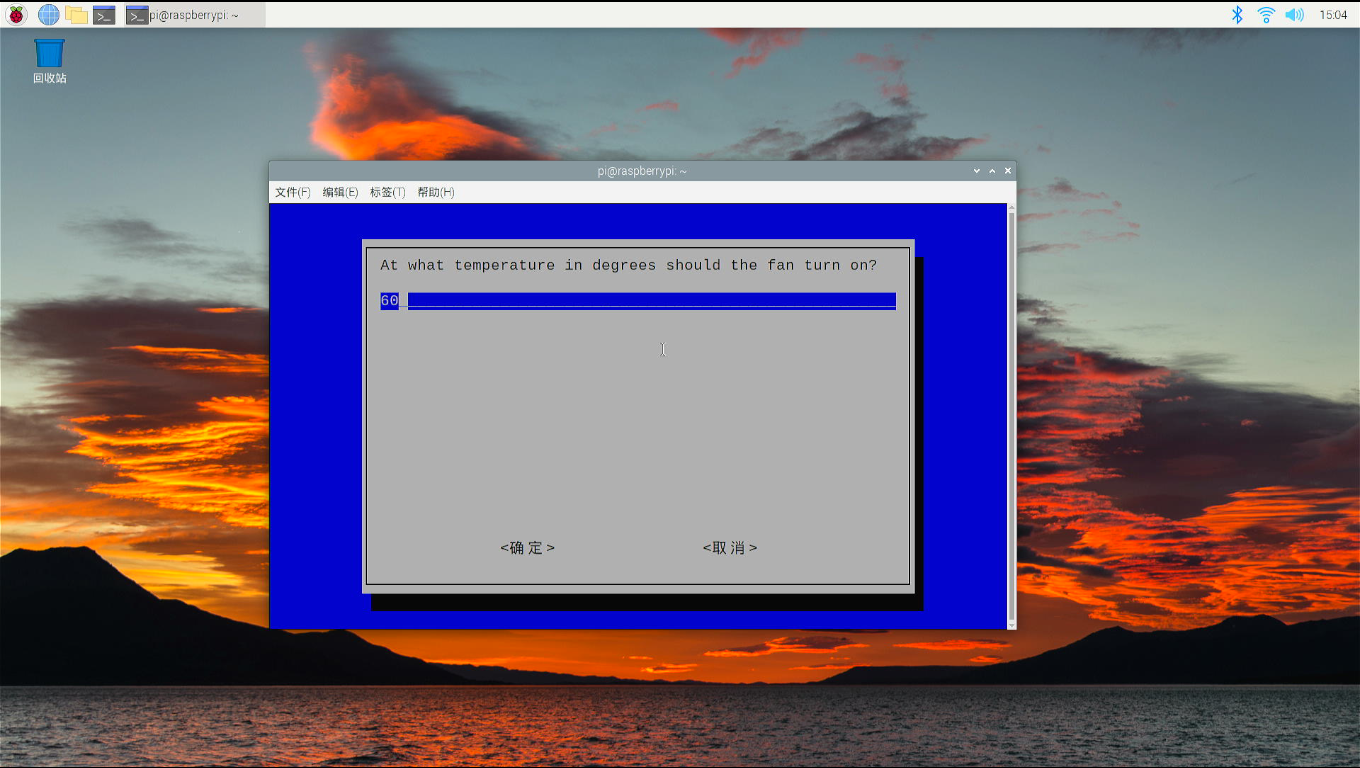
-
Select Yes when prompted to reboot your Raspberry Pi:
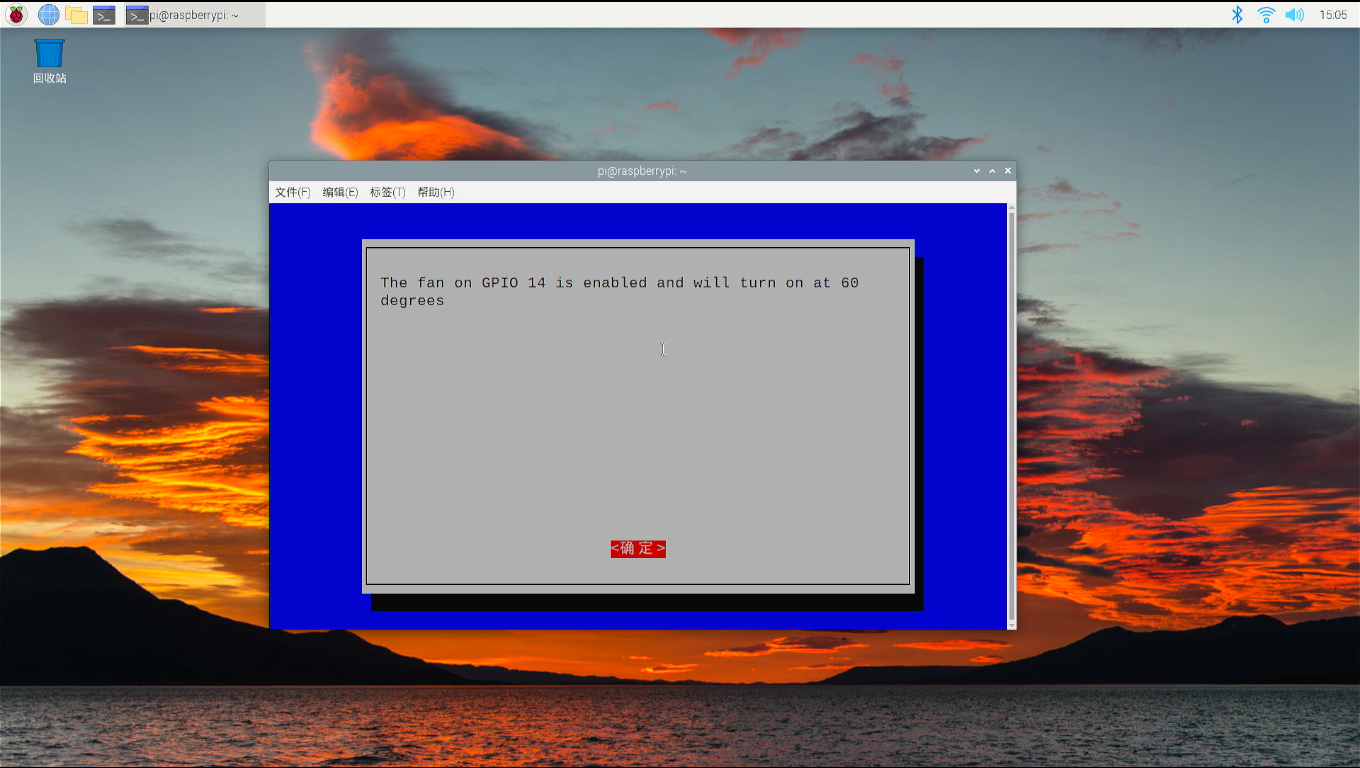
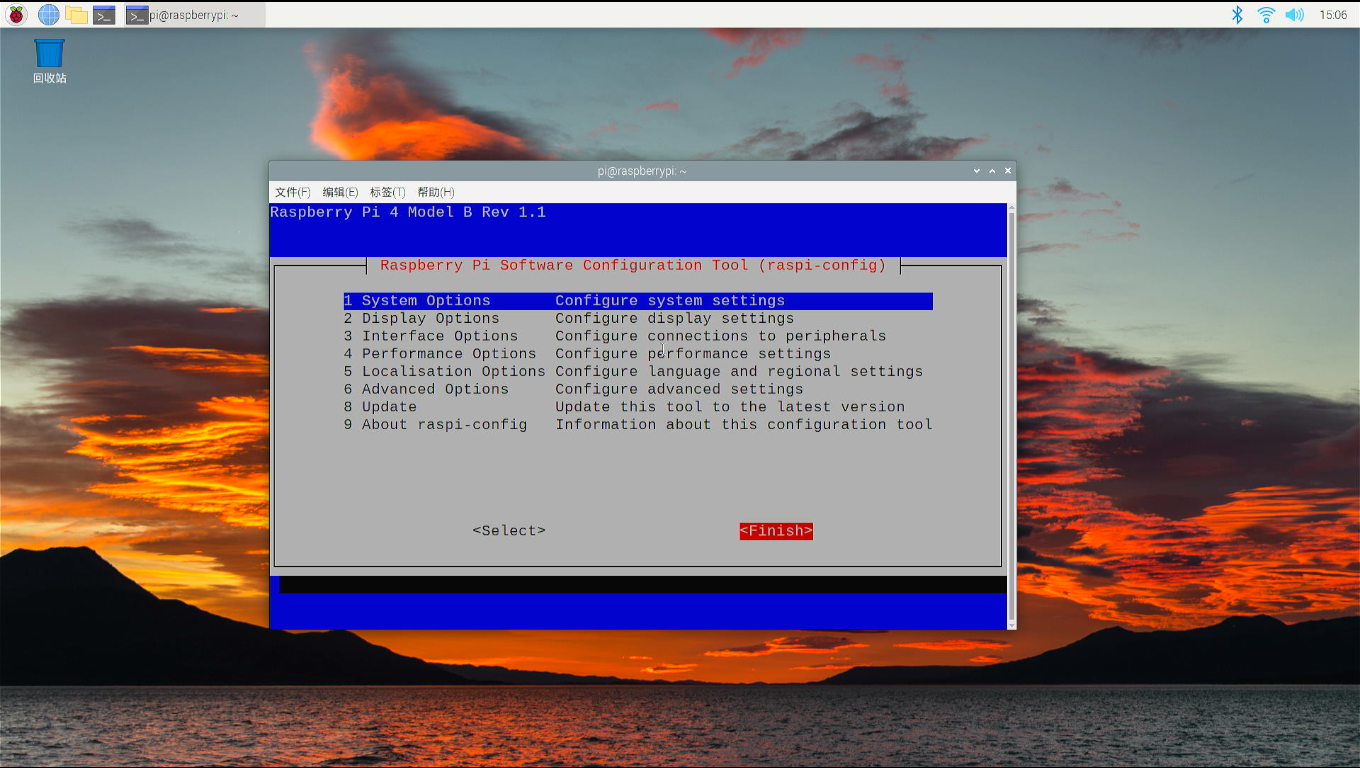
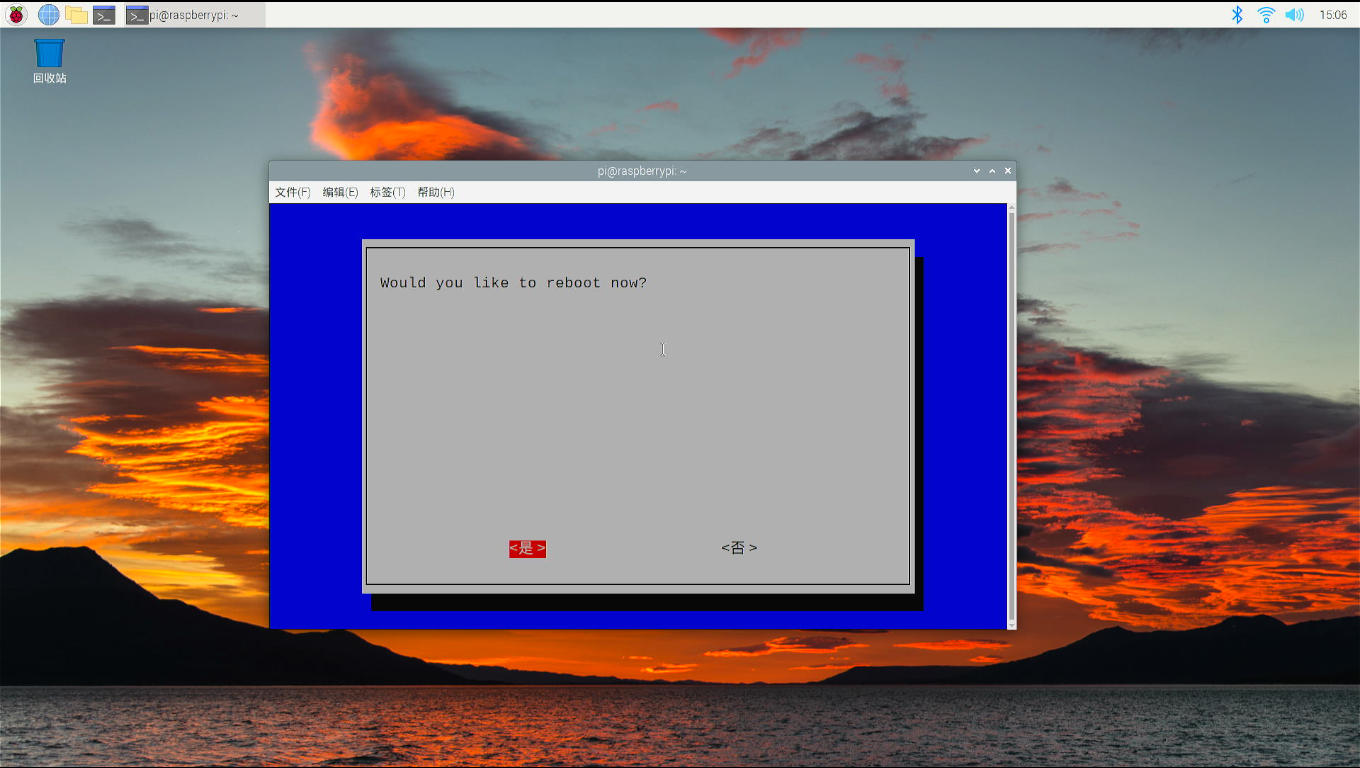
If you are using other OS on Raspberry Pi, please refer to how to generate PWM signal in your OS. Here is a demo code, it will help you to control the fan speed according to the temperature of CPU.
Demo code of fan control
#File Name: fan_control.py
#!/usr/bin/python3

import RPi.GPIO as GPIO
import time
import subprocess

GPIO.setmode(GPIO.BCM)
GPIO.setwarnings(False)
GPIO.setup(14, GPIO.OUT)
pwm = GPIO.PWM(14,100)

print("\nPress Ctrl+C to quit \n")
dc = 0
pwm.start(dc)

try:
    while True:
        temp = subprocess.getoutput("vcgencmd measure_temp|sed 's/[^0-9.]//g'")
        if round(float(temp)) >= 45:
            dc = 100
            pwm.ChangeDutyCycle(dc)
            print("CPU Temp:",float(temp)," Fan duty cycle:",dc)
            time.sleep(180.0)
        if round(float(temp)) >= 40:
            dc = 85
            pwm.ChangeDutyCycle(dc)
            print("CPU Temp:",float(temp)," Fan duty cycle:",dc)
            time.sleep(120.0)
        else:
            dc = 70
            pwm.ChangeDutyCycle(dc)
            print("CPU Temp:",float(temp)," Fan duty cycle:",dc)
            time.sleep(60.00)

except KeyboardInterrupt:
    pwm.stop()
    GPIO.cleanup()
print("Ctrl + C pressed -- Ending program")
Save it and execute it in a terminal:
python3 fan_control.py
Keywords
- DeskPi Lite M.2 SATA SSD Expansion kit, DeskPi Lite expansion board, M.2 SATA SSD driver board for DeskPi Lite.